

Mon-Fri 9am-6pm PST
+1 (800) 686-5898
support@longevitybased.com
Mon-Fri: 9am-6pm PST

TL;DR:
- Red light therapy enhances wound healing by stimulating mitochondrial activity and increasing ATP production.
- Use 630-670 nm for surface wounds and 780-850 nm for deeper tissue, at a fluence of 1 to 6 J/cm².
- Evidence is strongest for chronic wounds, particularly diabetic foot ulcers. It complements standard wound care rather than replacing it.
- Execution matters more than device cost: clean the wound first, verify your device's real irradiance, and track progress weekly.
Red light therapy can accelerate wound closure rates by up to 83% in certain conditions, a figure that surprises even seasoned biohackers who assume light-based interventions are more wellness trend than clinical tool. The reality is more nuanced and more compelling. Photobiomodulation (PBM), the technical term for therapeutic light application, has accumulated a substantial body of peer-reviewed evidence supporting its role in tissue repair. This guide covers the mechanisms, the exact protocols and dosing math, how to track results, and the honest limitations, so you can make informed decisions about incorporating red light therapy into your wound care strategy.
| Point | Details |
|---|---|
| Science-backed mechanism | Red light supports healing by boosting cellular energy, improving circulation, and reducing inflammation. |
| Wavelengths by depth | 630 to 670 nm targets superficial wounds; 780 to 850 nm reaches deeper tissue. |
| Irradiance threshold | Target a device above 50 mW/cm² to keep session times practical. |
| Dose window | 1 to 6 J/cm² per session. Exceeding 6 to 10 J/cm² can inhibit healing. |
| Best for chronic wounds | Diabetic ulcers and other chronic wounds show the greatest improvement. |
| Complement, not replacement | PBM adds to standard wound care. It does not replace infection control or debridement. |
| Verify and track | Confirm real irradiance against specs or a meter, and keep a treatment log. |
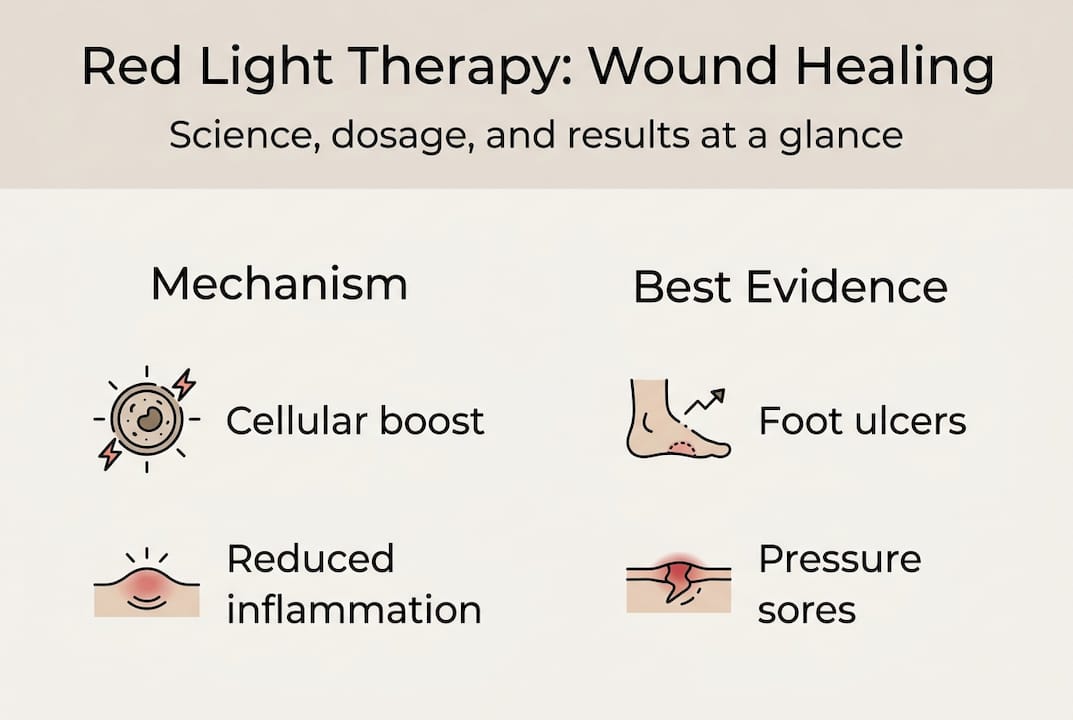
At the cellular level, red light therapy works by interacting with mitochondria, the energy-producing organelles inside your cells. Specifically, red light stimulates cytochrome c oxidase, a key enzyme in the mitochondrial respiratory chain, which boosts ATP (adenosine triphosphate) production and triggers a cascade of healing-related signaling pathways. More ATP means cells have the fuel to repair and replicate faster.
Beyond energy production, PBM also stimulates the release of nitric oxide, a signaling molecule that relaxes blood vessels and improves local circulation. Better blood flow means more oxygen and nutrients delivered directly to the wound site. This is not a subtle effect. It translates into measurable improvements in tissue oxygenation within minutes of exposure.
The therapy also activates several downstream mechanisms:
“Photobiomodulation therapy activates mitochondrial cytochrome c oxidase, increases ATP production, and initiates a sequence of downstream healing events that make it a clinically relevant wound care adjunct.” — Journal of Wound Care, 2019
If you are weighing red versus near-infrared light before choosing a device, understanding the infrared vs red light distinction is a useful starting point.
Not all red light is created equal. Wavelength and dose (fluence) are the two variables that determine whether your sessions produce results or simply generate heat and disappointment.
Wavelength selection:
Fluence: the goldilocks zone
Fluence refers to the total energy delivered per unit area, measured in joules per centimeter squared (J/cm²). Wavelengths of 600 to 1000 nm with fluences of 1 to 6 J/cm² consistently show the strongest wound healing outcomes in the literature. Going below 1 J/cm² produces minimal effect. Exceeding 6 to 10 J/cm² can actually inhibit healing, a phenomenon called the biphasic dose response.
| Parameter | Recommended range | Notes |
|---|---|---|
| Wavelength (superficial) | 630 to 670 nm | Skin and surface wounds |
| Wavelength (deep tissue) | 780 to 850 nm | Ulcers, muscle, deeper wounds |
| Irradiance | Above 50 mW/cm² | Lower output means impractically long sessions |
| Fluence | 1 to 6 J/cm² | Avoid overdosing |
| Session duration | 2 to 20 minutes | Device-dependent |
| Frequency | Daily or 5x per week | Consistency matters |
Pro Tip: Non-contact application (holding the device a few centimeters above the wound rather than pressing it directly on the skin) reduces contamination risk and allows more uniform light distribution across the wound surface.
For guidance on how often to use red light therapy based on your specific goals, frequency recommendations vary slightly by wound type and severity.
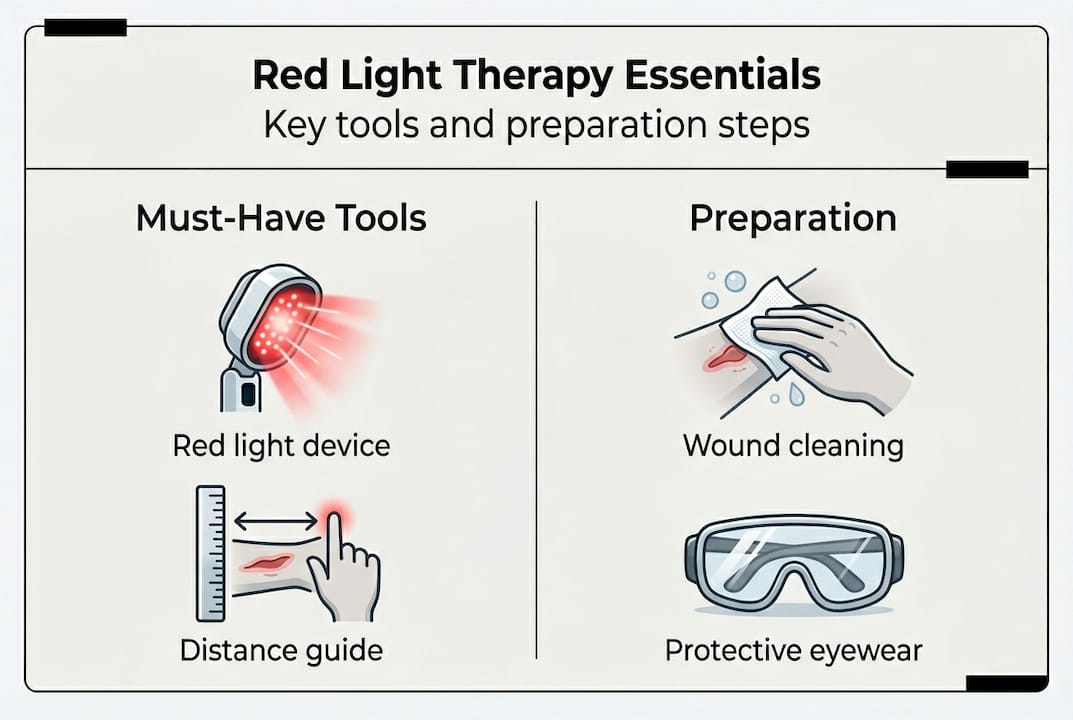
Choosing the right equipment makes the difference between effective therapy and wasted time. Power density, measured as irradiance in mW/cm², determines how much energy reaches your wound per second. Laboratory studies use devices delivering 20 to 100 mW/cm², but home users should target devices above 50 mW/cm² for practical treatment times. A device with 30 mW/cm² requires twice as long to deliver the same dose as one with 60 mW/cm², making sessions inconveniently long. Check manufacturer specifications or use a solar power meter to verify actual output, since many consumer devices overstate their capabilities.
Before applying therapy, prepare the wound using standard care protocols. Clean the area with saline or prescribed antiseptic, remove any loose debris, and pat dry gently. Apply red light therapy before redressing the wound, not through bandages or ointments that block light penetration. Position the device so light hits the wound bed directly, not at an angle that scatters photons away from target tissue.
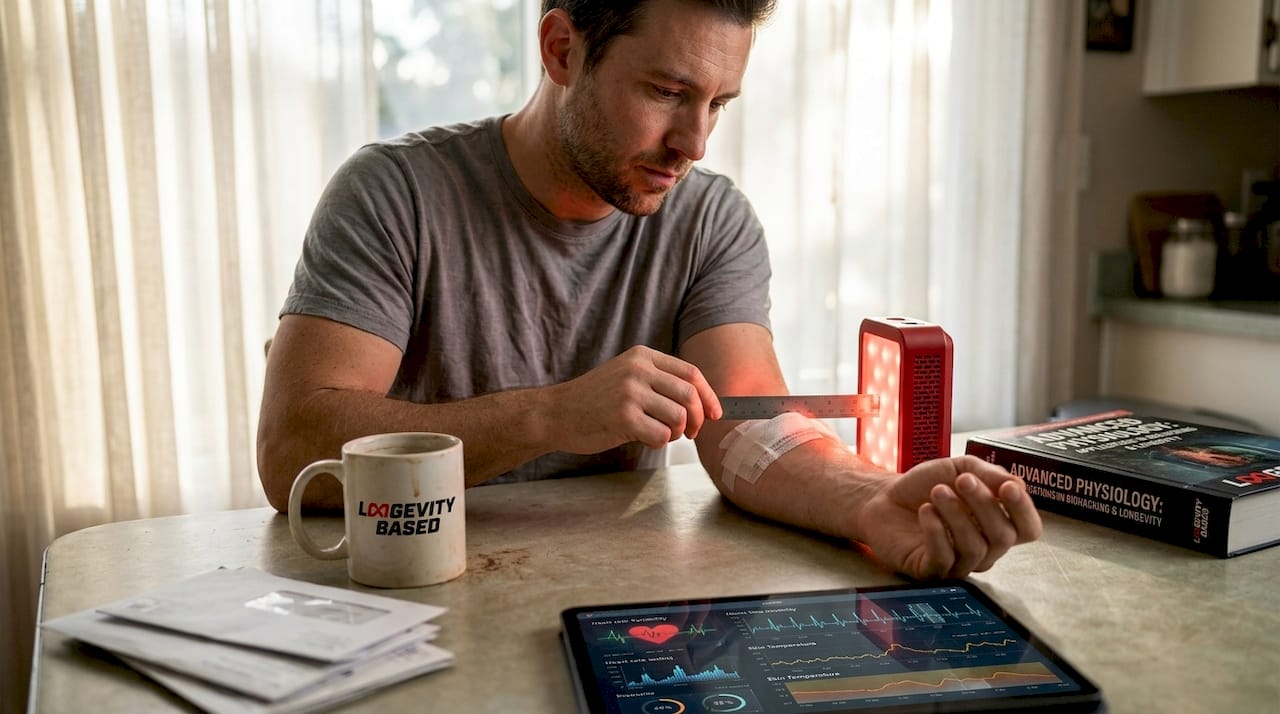
Pro Tip: Use a ruler or tape measure to mark the exact distance from device to skin, ensuring consistent dosing across sessions. Small distance changes dramatically alter irradiance due to inverse square law physics.
Accessories improve accuracy and safety. Distance guides or adjustable stands maintain consistent spacing between device and wound. Timers prevent accidental overdosing when you are distracted. Protective eyewear blocks stray light if treating facial wounds near eyes. A treatment log or smartphone app helps track session parameters, wound measurements, and healing milestones.
| Feature | Panel devices | Handheld devices |
|---|---|---|
| Coverage area | Large, treats multiple wounds simultaneously | Small, requires repositioning for coverage |
| Power consistency | Stable output across entire panel | Varies by distance and angle during use |
| Portability | Stationary, requires dedicated space | Compact, easy to travel with |
| Best suited to | Large or multiple treatment areas | Targeted wounds and hard-to-reach spots |
Browse red light therapy devices that meet clinical specifications, and consider measurement devices to verify your equipment delivers advertised power levels before starting treatment protocols.
Precise technique matters more than expensive equipment. Follow these steps to deliver effective doses without guesswork.
Clean the wound first. Standard wound care comes before light therapy. Remove debris, and ensure the wound is free of active infection before beginning sessions.
Calculate your target dose. Multiply your device's irradiance by treatment time to determine energy dose. A device delivering 60 mW/cm² for 90 seconds provides 5.4 J/cm² (60 × 90 ÷ 1000). Start at 2 to 4 J/cm² for initial sessions and work up within the 1 to 6 J/cm² window as tolerance develops.
Position the device correctly. Hold the light source a consistent 2 to 5 cm above the wound for targeted handhelds, or 6 to 12 inches for panels. Closer distances increase irradiance but reduce coverage area. Measure and mark your chosen distance to maintain consistency across all sessions. Do not press a device against an open wound.
Set treatment duration. For a device with 50 mW/cm² irradiance targeting 5 J/cm², treat for 100 seconds (5000 mJ ÷ 50 mW). Round to the nearest 30-second increment for practical timing. Most wounds respond well to 2 to 5 minute sessions depending on device power.
Apply consistently. Treat once daily for minor wounds, or twice daily for chronic or severe injuries, spacing sessions at least 6 hours apart so cellular responses complete before the next stimulation. Monitor response and reduce dose if you see no improvement after one week, as excessive dosing can inhibit rather than accelerate healing.
Document each session. Record date, time, device distance, treatment duration, and any observations about wound appearance or symptoms. This log helps identify patterns and guides adjustments if healing plateaus.
Pro Tip: Treat immediately after cleaning and before applying new dressings. Photons penetrate clean tissue far more effectively than through ointments, creams, or bandage materials that scatter and absorb light energy.
Frequency and consistency produce better results than sporadic high-intensity sessions. A wound treated with 5 J/cm² daily for two weeks receives more cumulative benefit than the same wound treated with 10 J/cm² three times weekly. Cellular repair mechanisms respond to regular stimulation patterns, not occasional intense doses.
Adjust protocols based on wound characteristics. Shallow abrasions heal faster and may only need 7 to 10 days of therapy. Deep surgical incisions or diabetic ulcers require 3 to 6 weeks of consistent treatment. Infected wounds need antibiotic therapy first; red light therapy accelerates healing only after infection is controlled.
For treating wounds in hard-to-reach locations, explore portable red light therapy devices.
Even experienced users make dosing errors that compromise results. Avoid these pitfalls to maximize healing acceleration and prevent setbacks.
Overdosing above 10 J/cm². Excessive energy inhibits fibroblast activity and collagen deposition through the biphasic dose response. More light does not equal faster healing. If you exceed 10 J/cm² per session, reduce treatment time or increase device distance.
Skipping standard wound care. Red light therapy enhances healing but cannot sterilize infected tissue or replace surgical debridement. Always clean wounds, remove necrotic material, and follow medical instructions first.
Using unverified devices. Many consumer products claim therapeutic power but deliver less than 20 mW/cm², making effective dosing impossible within practical timeframes. Devices without published irradiance specifications or independent testing waste your money and time.
Treating through barriers. Ointments, hydrocolloid dressings, and clothing block photon penetration. Remove all barriers before therapy, then reapply dressings after the session ends.
Ignoring skin reactions. Mild warmth during treatment is normal, but persistent redness, increased pain, or irritation signals excessive dosing. Take a 48-hour break and resume at 50% of your previous dose.
Some clinical trials show inconsistent results due to dosing heterogeneity across studies. Researchers use vastly different wavelengths, power densities, and treatment schedules, making direct comparisons difficult. This variability means you must track your individual response rather than expecting universal outcomes.
If healing stalls after initial progress, reassess your protocol. You may need to increase dose slightly if starting too low, or decrease if inadvertently overdosing. Wound healing is not linear; expect periods of rapid improvement followed by slower consolidation phases. Patience and consistent tracking reveal whether therapy is working or needs adjustment.
Objective tracking separates effective protocols from wasted effort. Use these methods to quantify healing and make data-driven adjustments.
Photographic documentation provides visual proof of progress. Take photos weekly under consistent lighting conditions, using the same camera angle and distance. Place a ruler or coin next to the wound for scale reference. Compare images side by side to spot subtle changes in wound bed color, edge epithelialization, and granulation tissue formation that daily observation might miss.
Measure wound dimensions using the length-times-width method. Identify the longest axis of the wound and measure in millimeters. Rotate 90 degrees and measure the widest perpendicular axis. Multiply these values to calculate wound area in square millimeters. A wound measuring 15 mm × 10 mm has an area of 150 mm². Track this number weekly; consistent reduction indicates effective healing.
| Metric | Week 1-2 | Week 3-4 | Week 5-6 |
|---|---|---|---|
| Wound area reduction | 10-20% decrease | 30-50% decrease | 60-80% decrease |
| Pain level (0-10 scale) | Slight reduction | Moderate reduction | Minimal or absent |
| Exudate amount | May increase initially | Decreasing steadily | Minimal or dry |
| Granulation tissue | Beginning to form | Filling wound bed | Complete coverage |
Track subjective symptoms alongside objective measurements. Rate pain on a 0-10 scale before each session. Note changes in swelling, redness, warmth, or drainage. Improved symptoms combined with shrinking wound size confirm therapy effectiveness. Worsening symptoms despite size reduction may indicate infection requiring medical evaluation.
Compare your progress against expected healing timelines. Acute wounds typically close within 2 to 3 weeks with therapy, versus 3 to 4 weeks without intervention. Chronic wounds show measurable improvement within 2 weeks if therapy will succeed; lack of any progress by day 14 suggests protocol adjustment or medical consultation.
The clinical picture for red light therapy in wound healing is genuinely encouraging, but it is not without complexity. Here is what the data actually shows.
Where it works best:
Where the evidence is mixed:
| Wound type | Evidence strength | Expected benefit |
|---|---|---|
| Diabetic foot ulcers | Strong (Level IA) | High |
| Chronic venous ulcers | Moderate to strong | Moderate to high |
| Post-surgical wounds | Moderate | Moderate |
| Episiotomy wounds | Weak or conflicting | Low to none |
| Minor acute cuts | Limited | Minimal |
Red light therapy does not replace infection control, debridement, or physician-directed care. For anyone managing a surgical scar healing protocol, PBM works best as a complement to standard wound care, not a substitute. For those specifically dealing with diabetic wound management, the therapy for diabetic wounds options available include targeted foot devices designed for this application.
Nutritional support amplifies red light therapy results by providing raw materials for tissue repair. Collagen peptides supply amino acids for extracellular matrix formation. Vitamin C acts as a cofactor for collagen hydroxylation, the biochemical step that stabilizes new tissue. Zinc supports immune function and epithelial growth. Combining therapy with 10 to 20 grams daily collagen, 500 to 1000 mg vitamin C, and 15 to 30 mg zinc creates synergistic healing acceleration that neither intervention achieves alone.
Check with your healthcare provider before adding supplements, particularly if you are managing a chronic wound alongside other medications.
After following the photobiomodulation literature closely, one pattern becomes clear: most failures in red light therapy for wound healing are not failures of the therapy itself. They are failures of execution. Underdosed devices, inconsistent session schedules, and a lack of baseline wound care are responsible for the majority of disappointing outcomes.
The field also suffers from a standardization problem. Standardized protocols for clinical adoption are still being developed, which means the gap between what works in a controlled trial and what gets applied at home or in a clinic remains significant. This is not a reason to avoid the therapy. It is a reason to be precise about it.
For biohackers, the temptation is to treat red light therapy as a standalone solution. It is not. The strongest results consistently come from combining PBM with proper wound hygiene, nutrition that supports tissue repair, and appropriate medical oversight for complex wounds. The tactics that actually move the needle are the ones built around a complete protocol, not just a device.
Think of red light therapy as a precision tool. Its value depends entirely on how skillfully you use it.
Ready to take the next step toward safer, more effective at-home wound healing? Choosing the right device is the single most important variable in your protocol. Longevity Based curates a range of FDA-cleared red light therapy options designed for both targeted and full-body applications. The BioLight collection includes devices built to clinical irradiance standards, so you can trust that your fluence is within the therapeutic window. For portable, targeted wound care, the BioLight Glow device offers a compact solution without compromising on output quality. The Shape Tactics low-level light therapy device pairs therapeutic wavelengths with an ergonomic design for precise wound treatment. Complement your protocol with recovery tools that support systemic healing, and browse the full range to find the right fit for your recovery goals.
The strongest evidence is for chronic ulcers, particularly diabetic foot ulcers, where multiple meta-analyses show significant improvements in healing rates and pain reduction. Chronic non-healing wounds consistently outperform acute wounds in clinical response to PBM. Surgical incisions, pressure sores, and minor burns also respond well.
Most users notice reduced pain and inflammation within 3 to 5 days of consistent treatment. Visible wound size reduction typically appears by day 7 to 10, and a course of 4 to 10 sessions is often enough to observe measurable improvement. Complete closure depends on wound severity but generally occurs faster than without therapy.
No. Treat infections with appropriate antibiotics or antiseptics before starting light therapy. Red light stimulates cellular activity but does not kill bacteria or sterilize tissue. Apply therapy only after infection is controlled, to avoid spreading pathogens or delaying necessary medical treatment.
Red light therapy is safe with minimal side effects across skin types, and red and near-infrared light at therapeutic intensities do not damage healthy tissue or cause burns. Avoid direct eye exposure during facial treatments, and discontinue use if you develop persistent irritation. It should never replace infection control, debridement, or physician-directed medical care for complex or infected wounds.
Yes, home use is viable when you use FDA-cleared devices with verified irradiance output and follow evidence-based dosing recommendations, starting at lower fluences and adjusting based on wound response. Prioritize a device with published irradiance specifications above 50 mW/cm².
No. Red light therapy complements standard wound care but never replaces it. Continue cleaning wounds, changing dressings, and following medical advice while adding light therapy as an enhancement. Severe wounds, signs of infection, or lack of healing progress within two weeks require professional medical evaluation regardless of therapy use.


